All I ever wanted a kid was to get one of those awesome Girl Guide sashes covered in badges. I think it is the hyper-competitive collector in me – who wouldn’t want a strip of fabric covered in evidence of cool things you’ve done that you can show off to everyone? Now that I am a “grown up” it’s time to start awarding my own badges. As an impatient sewer with limited attention to detail the fact that I have made my fourth button up shirt must count for something, right? So here is the top that earned me the Button Up Shirt Badass badge. Huzzah!
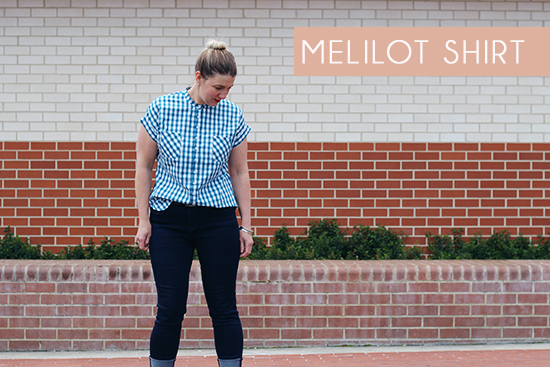
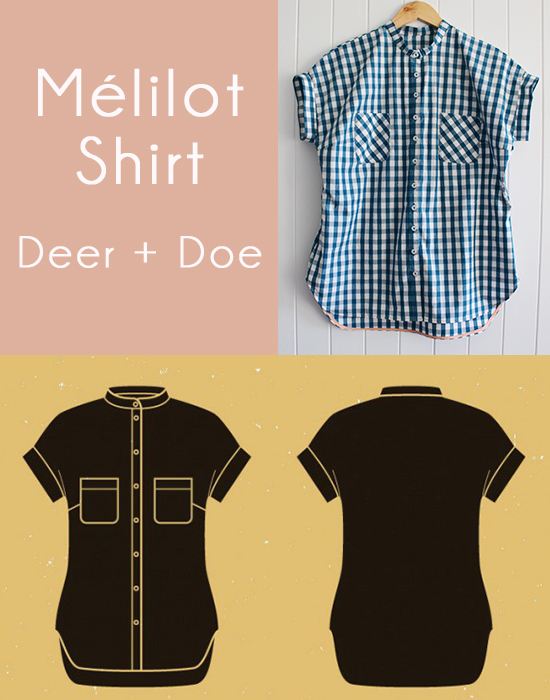
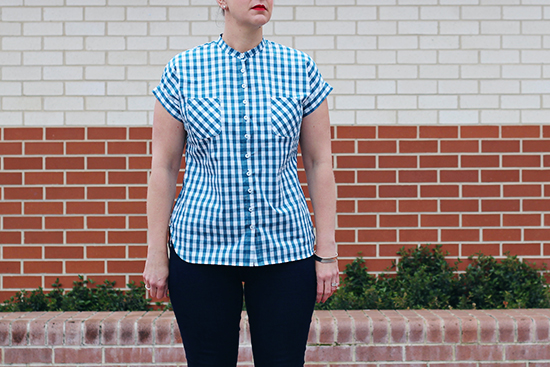
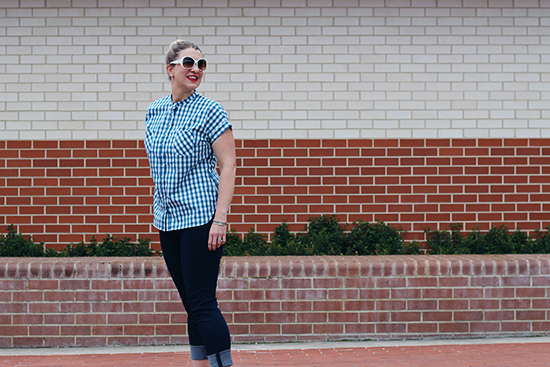
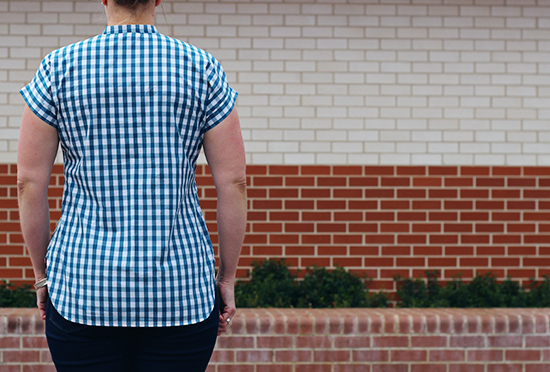
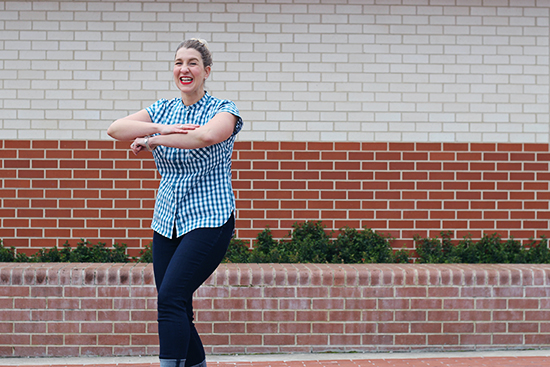
This is the Mélilot Shirt by Deer and Doe and the third project in my quest to find a rad button up shirt! The Mélilot features drop shoulders, bust darts and jaunty pockets. I made up Version B which features cuffed shirt sleeves and a Mandarin collar. And may I say the cuffed sleves are ace – they make me feel like an extra in an 80s super hero film! Win!
The fabric is a crazy amazing teal gingham Pima cottom all the way from Lima, Peru! If we ever get a chance to meet up in person the story of getting this fabric is one that will be shared – a crazy and intense mis-adventure that resulted in tops fabric. Just what you want in all your travel stories! But I digress, having never used Pima cotton before I wasn’t sure of the allure until I felt it. Wowser! The only cotton I can compare it to is Liberty – the weave is lovely and tight and it feels crazy amazing. So glad I bought four pieces!
The construction of the Mélilot was pretty straightforward and the instruction booklet is lovely and clear – if you bring the one in your native language to your sewing meetup. Oops! Needless to say, the instructions are well illustrated so that even if you accidentally have the French instructions (and do not speak French) you can still make it work!
I played strictly by the book for this make and only varied from the patterns to French seam everything inside. And may I say this worked super well – check out this gingham matching on freaking French seams! Surely I get some kind of rad prize for this? Maybe a basket of imaginary puppies?
As always, the collar managed to stuff me up. I tried using the enclosed instructions, and whilst they make sense, my butter fingers managed to screw it up. In the end the collar was ripped out, recut and reinserted using old faithful (aka Andrea’s method). I officially give in and will now use this method rather than attempt pattern instructions – well, except for the Bruyere. That collar is fierce!
Fit wise I ignored my FBA requirements and thanks to the block used to draft Deer and Doe patterns, there was no issues. If I didn’t have pockets on this then the darts would have been shortened by an inch. But all hail pockets! The next time I make this I will do a broad upper back adjustment again (like in my Coco Jacket) as there is some pulling in this area.
What I liked about this pattern:
- How casual yet rad it is. I’m not normally a fan of a dropped shoulder but the shoulder cuffs on this add a level of radness I can get behind.
- The Mandarin collar. I’ve never done one of these before and they are seriously cool!
- The pockets! They are lined! I am sure this is old hat to veteran shirt crafters but this gal never adds pockets to her lady cargo so lined pockets were an unexpected treat.
What I would change for next time:
- Broad upper back adjustment. She-Hulk back needs a little bit more room to move.
- Swishy fabric. I’d love to try this in a drapey fabric and even have a bash at the covered button placket thingy. Not sure of the term but if you check the pattern out Version A has a sweet placket cover.
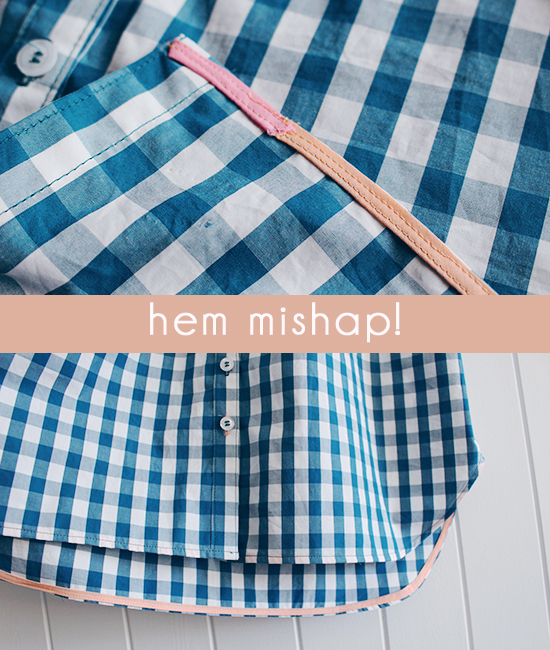
- Try a narrow hem. I have avoided this technique for so long and have been using hem binding. Which backfired this time due to a miscalculation by an inch. Oops! It’s time to learn how to make a curved narrow hem…
The Deets
Pattern: Mélilot Shirt by Deer and Doe
Fabric: 1.4m of Pima cotton from deepest, darkest Peru (or a store in Lima, but who can resist a Paddington Bear reference?)
Notions: 11 buttons, thread, interfacing, sass
See also: Attack of the Seam Ripper, What Katie Sews, By Sandra Hand
Overall, I am super happy with the Mélilot – it is exactly what I’m after with a casual button up. The fit works well with my shape thanks to the tapered waist and bust darts and the sweet little finishes make this feel special to wear. For a first bash at a pattern with no modifications, this is a definite win and the gingham makes me want to go square dancing. Yee-haa!

Great shirt. With summer just around the bend, this may be the shirt pattern to try.
It is a total winner pattern, Gail! Well worth a go 😀
Oooo, can we brainstorm other sewing badges? “Satin Sewing Diva,” “Ace Machine Buttonholes,” “Fit a Pattern to Me Perfectly,” “Pin Drew Blood; Didn’t Cry.”
Yes please!!!
Ohhh! These are fabulous! How about Plaid Matching Perfection? Fierce Fabric Choice? More Sewing Than Seam Ripping? 😀
You totally get all of the lady sewing badges!! Such gorgeous, gorgeous gingham work, I bow before your magnificence!
I also can’t wait to hear the tales of Peruvian backstreet banters and Llama libaciousness (is so a word) when we next meet in person x
We all need sewing badges! I’ll fill you in next time we catch up, for sure! 😀
Fabulous! Love hem binding! Don’t give up it!
I kind of am addicted to it now… Must. Bind. Everything!
I love this top: love the design, love your Pima cotton, love an 80s sleeve reference and love the way it fits you. Just awesome (and I want one too).
Thanks, Gabrielle! I am a total convert to Pima cotton now!
once you do your first narrow hem (i did my first one on a shirt earlier this week) you’ll be like, binding what? love the teal gingham!
Ohh, I must get on the narrow hem wagon!!!
I too love Deer & Doe patterns! The fit is amazingly accurate. Beautiful shirt! I’ve been in shirt making mode too. I realized one day much to my surprise I didn’t own one single blouse 🙂 Your shirt would look lovely all sewn on the bias too in a gingham 🙂
They have so many lovely patterns! Yay for shirt making kicks – it is what all the rad ladies are doing!
This is gorgeous and it looks so fresh! Also, not hem mishap…hem DETAIL!
Thanks, Lisa! I like hem detail much better! 😀
Yes to all this! Badges, that bruyere facing thing, the shape of this top (casual but polished – perfect!), and I want to hear the travel fabric story!! 🙂
Thanks, Lindsay! I think we all need some rad sewing badges! 😀
I would french seam all the things for baskets of imaginary puppies.
For reals though – great shirt! And fabric! You deserve all the badges! I definitely need to add this pattern to my Deer & Doe arsenal 🙂
Imaginary puppy baskets are total French seam motivators 😉
It’s a rad pattern! Totally try it out!
Super shirt, looks fab in gingham, I like the idea of a drapey one too.
I can’t wait to try the drapey version – just need to pick the perfect fabric! 😀
God job you live so far away or I’d be breaking into your house and stealing this shirt. And that’s a fact! Love it, in so many different ways! x
Teehee! I could totally see you rocking this gingham 😀
I LOVE this! I have had my eye on this pattern for a while – especially in long sleeve silk! Eeek – now I really really must get it as yours looks FAB! xx
Ohh, a long sleeve silk version would be amazing!!!
I absolutely love this! I’ve been meaning to buy this pattern for a while and now I must! I love it in gingham too 🙂
Thanks, Kate! It is such a great pattern 😀
Man, I’ve loved every version of this top I’ve seen! Yours is no exception, especially in that awesome gingham. (PS I like sewing rolled narrow hems by machine-basting at the hem line, pressing, then folding under. The basting really helps!)
Ohhh! That is some pro-hem tips there 😀 Thank you!
Beautiful shirt, I love that fabric! I’ve always disliked narrow hems because they usually mean burnt fingertips but I recently saw a tip from Grainline that I need to try out, she suggests sewing a scant 1/4 inch from the raw edge and using the sewn bit to a) mark where the fabric needs to turn under on a narrow hem and b) help it turn. You turn it so the stitching is just on the inside, iron, and then turn again. I think doing that would make a narrow hem much easier!
Thank you for the tips on the hem! I am really keen to give them a go 😀
Hmmm what about a basket of real puppies?? Cuz I can squish their little faces.
Cute shirt! And narrow hems are the devil…well maybe not, I just haven’t mastered them yet.
A basket of real puppies would be the best thing ever! Could we share it though because I would also be in on that face squishing 😀
Oooh, that gingham sounds superb!! and the shirt is totally lovely on you. I love the contrasting pink binding along the hem! what a pity you can’t see it. I totally reckon this should be on the outside. And please please please create some of those sewing badges… that’s just too awesome for words!!
I must admit that the binding won me over so much I have grabbed some more for my next project. Ohhh suspenseful! 😉
I am having problems understanding the plackets, does anyone know how to do it? are there any area longs or step by step pictures? Help x
So sorry for the delay in reply – my email didn’t send me a notification of your post 🙁 I will check my top when I get home and confirm but pretty sure I did my normal placket insertion which uses the Grainline Archer method. 🙂